Clay cutter set from a picture
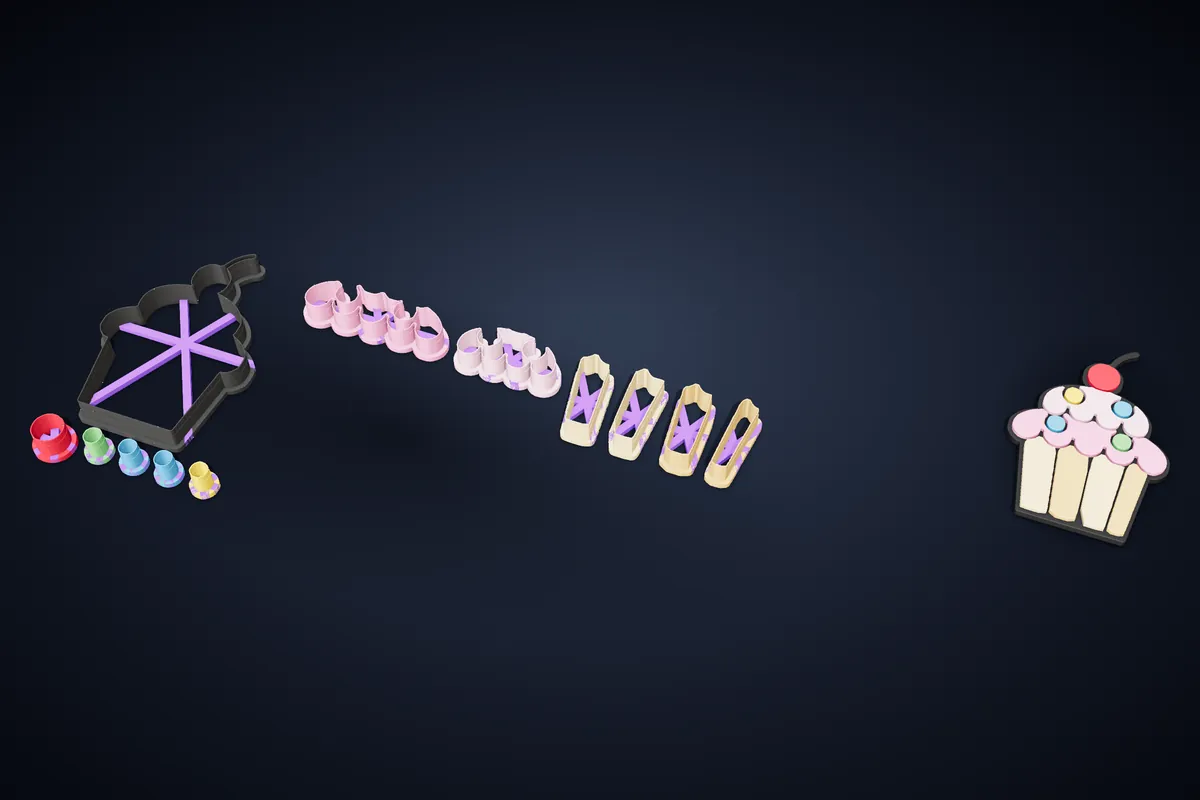
Turn a coloured drawing into a set of cutters that rebuild it in clay. One big cutter makes the base in the outline colour, a small cutter for each coloured area makes the pieces, and laid together they become the picture.
Just one project? A 7-day Pro pass is €4.99, no subscription.
How it works
- 1
Upload a flat-colour drawing
PNG or JPG, in sticker or colouring-book style: flat colours separated by dark outlines. The studio finds the silhouette and every colour area between the lines.
- 2
Set the size
Type the length of the longest side, from 20 mm to 300 mm, and every cutter in the set is scaled together so the pieces fit the base exactly.
- 3
Tune how the picture is read
Outline darkness, colour tolerance and edge smoothing decide where one area ends and the next begins. Areas smaller than the smallest piece you set are listed rather than made, so you can cut those by hand.
- 4
Download the set
One ZIP named after your picture, with the base cutter and every piece cutter as STL, grouped by colour so you can see how many pieces each clay colour needs.
How the picture is made
Roll out the outline colour — black works best — and cut the base with the big cutter. Then cut each piece from its own colour and lay the pieces on the base like a puzzle. Press lightly and the picture appears, with the base showing between the pieces as the outlines.
Because every cutter comes from the same picture at the same scale, the pieces land where they belong without trimming. If you prefer tighter joins, grow the pieces a little to close the gaps; shrink them if you want thicker outlines.
- Base cutter
- The whole silhouette. A picture with separate parts gets one base per part.
- Piece cutters
- One per colour area, named by colour and sorted biggest first within each colour.
- Dark areas
- A dark area thicker than the outline, such as a black hat or a pupil, can become its own piece.
- Tiny areas
- Anything below the smallest piece size is left for hand cutting — a drinking straw makes perfect dots.
Which pictures work
Clean, flat colour with clear dark outlines works best: cartoon characters of your own, children's drawings traced in marker, stickers, simple logos. Shading and gradients split into many small areas, so raise the colour tolerance for a shaded picture or simplify it first.
Size matters as much as the picture. A detail that is 3 mm wide on a 120 mm picture is too small to cut cleanly in clay, so either make the picture larger or accept that a few dots are done by hand.
Printing the cutters
Print the cutters flat, cutting edge upward. A 0.2 mm layer height, three or four perimeters and 15–20% infill suits almost everything here, and none of it needs supports when printed flat on the bed.
For clay, a cutter around 10 to 12 mm tall is plenty. The piece cutters are small, so print them together on one plate and label the colours on the bags as they come off the printer.
Questions
What kind of image do I need?
A PNG or JPG with flat colours and dark outlines between them. A photograph will not split into clean areas; a drawing in the style of a sticker or a colouring book will.
Can I use it for cookie dough or fondant?
Yes. The method is the same with coloured fondant or dough; keep the picture larger, since soft materials do not hold fine pieces as well as polymer clay.
What if two colours merge into one piece?
Lower the colour tolerance, or raise the outline darkness if grey outlines are being read as colour. The preview updates as you change them.
Which plan includes it?
The multicolor picture set is part of the Sets tab, included in the Pro and Ultra plans. You can upload a picture and see the full set before you subscribe.
Related
Try it now
Pro includes this mode. Cookie cutters stay free.
Just one project? A 7-day Pro pass is €4.99, no subscription.