Lithophane maker
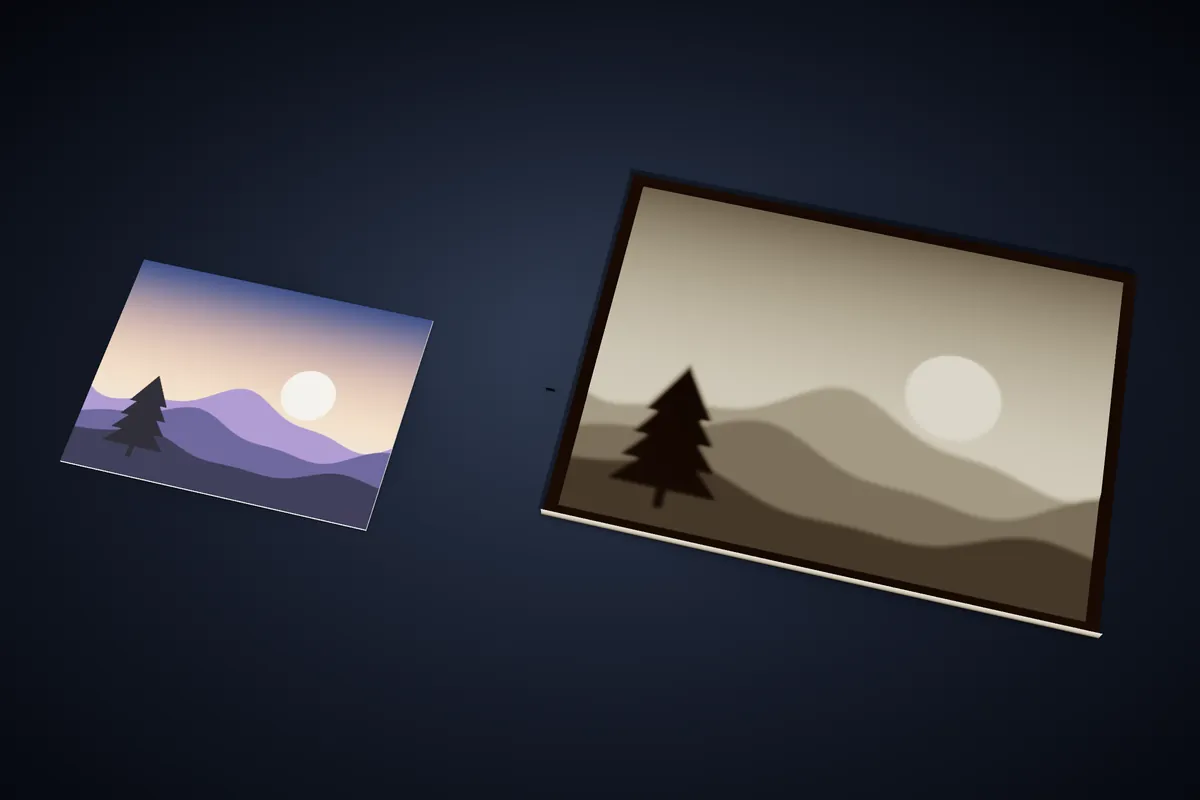
Upload a photo and get a panel whose thickness is the picture: thin where the photo is bright, thick where it is dark. Held against a window or a lamp, the photo appears in the plastic.
Drop your photo here
JPG or PNG · up to 20 MB · a 3D lithophane preview in seconds
Choose a photoJust one project? A 7-day Pro pass is €4.99, no subscription.
How it works
- 1
Upload a photo
PNG, JPG or WebP. The photo is converted to brightness in your browser and cropped to the panel's proportions from the centre, so it is never squashed.
- 2
Choose flat or curved
A flat panel for a frame or a window, or a curved one that stands on its own — anywhere from a gentle 10° arc to a half cylinder of 180°.
- 3
Set size and thickness
Width and height from 20 to 250 mm. The thinnest part (the brightest light) from 0.4 mm and the thickest up to 8 mm, with an optional flat border up to 20 mm wide.
- 4
Tune the picture and download
Contrast, smoothing, six detail levels and an invert switch for negatives. The preview shows the relief as you adjust it, and the STL is checked before download.
How a lithophane works
Light passing through white plastic dims with every fraction of a millimetre. A lithophane uses that: each point of the panel is given a thickness from the brightness of the same point in the photo, so the shadows are thick and the highlights thin.
In daylight it looks like a pale, textured plate. With light behind it, the photo appears with a depth and softness that a printed picture does not have — which is why they are such a popular gift.
- Minimum thickness
- The brightest areas. Around 0.8 mm is a good start; thinner is brighter but more fragile.
- Maximum thickness
- The darkest areas. Around 3 mm gives deep blacks without making the panel slow to print.
- Contrast
- An S-curve around mid-grey that lifts a flat photo; 1 leaves it as it is.
- Smoothing
- Softens noise and JPEG blocks so the panel prints cleanly.
- Detail level
- Six steps from 0.6 mm down to 0.16 mm between samples. Higher is sharper and heavier.
- Border
- A flat frame of solid thickness that stiffens the panel and gives it an edge to hold.
Choosing the photo
Faces, pets and landscapes with a clear subject make the best lithophanes. Busy backgrounds turn into a texture that competes with the subject, so crop tight before you upload.
Because thickness follows brightness, an evenly lit photo works better than one with harsh sun and deep shadow. If the result looks flat, raise the contrast a little rather than widening the thickness range.
Printing it
Use white or natural PLA — colour absorbs the light the picture needs. Print with 100% infill so the light passes evenly, a fine layer height such as 0.12 mm, and a slow outer wall.
Printing the panel standing upright gives the finest detail, because the thickness is then laid down by the nozzle's horizontal moves; a wide brim keeps it steady. Printing it flat is quicker and still looks good for larger panels.
Questions
What makes a good lithophane photo?
A clear subject, even light and not too much background. Portraits, pets and simple landscapes are ideal. Crop the photo to the panel's shape first so the important part is not cut off.
Flat or curved?
Flat for a frame, a window or a lamp box. Curved panels stand up on their own and look good in front of a candle or LED; a 60° to 120° arc is typical.
Which filament should I use?
White PLA. Other colours work but tint and darken the picture. Avoid silk and glossy filaments, which scatter the light unevenly.
Can I try it before paying?
Yes. The studio opens on the lithophane type; upload a photo and turn the panel round in 3D. Downloading needs the Pro plan, or a 7-day pass if it is a one-off gift.
Is my photo uploaded anywhere?
No. The photo is read and turned into a model in your browser. It is only stored if you save the design to your account.
Related
Try it now
Pro includes this mode. Cookie cutters stay free.
Just one project? A 7-day Pro pass is €4.99, no subscription.